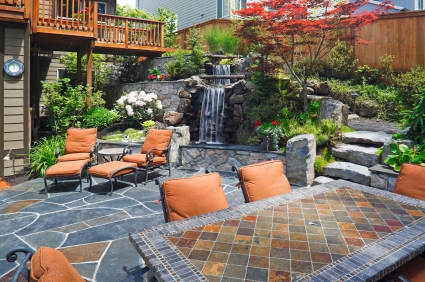
 When it comes time to enjoy your outdoor living space, you want a spot that reflects your personal style and offers you some privacy. Figuring out how to get that privacy can be challenging.
When I was designing our family’s outdoor space, I wanted to keep the lines clean and simple, while also providing distinct areas for each use. The easiest way to do that during the landscaping process was to use pavers to define the outdoor space.
Map out your landscape and patio plan
Before ordering pavers and setting out to buy patio furniture, it is important to draw or map out what the space will look like. My family originally wanted a fire-pit area off to the left of the house, but when we mapped everything out and measured, we discovered that there was a lot more room on the right and it would work much better there. If we had not mapped it out, we would have started laying the pavers only to discover that the space would not serve our needs. Mapping everything out also saves you money, because it helps you get a much more accurate assessment of your product needs.
Defining outdoor living spaces
Once we knew where everything was going to be placed, we had to decide how to define each space. For the fire pit area, we created a circular pattern with the pavers to match the shape of the focal point in the space. The dining or patio table area had a very simple plain paver in the center and was then outlined by a darker paver color. This helped to define the space without distracting family and guests from the food and conversation around the table.
We also had a gathering area where comfortable patio chairs and small tables were placed. This was an informal and family friendly area so we wanted something a little less plain than the dining space. We ended up using the pavers in a zig-zag pattern to offer a bit of whimsy and visual interest. The three distinct areas were tied together by the common color and material composition of the pavers.
Laying the pavers
As with all pavers and patio flooring, the key is to create a flat, level surface before laying the pavers. After we flattened out the area and made sure that it was level, we dumped a thin layer of sand across the area. We then referred to the map we had made of the project and were able to recreate the patterns based on the drawings we had done. After the pavers were placed, more sand was used to fill the gaps before we stamped the pavers in place.
Defining the outdoor living space with pavers is a great way to add a lot of visual interest to your patio without a lot of additional expense. Alternating design and pattern of the pavers in each space made it easy to see where one space began while another ended. The commonality between the colors of the pavers in each area really tied the look together.
This article was written by Jessica Ackerman of WallDecorandHomeAccents.com – the best place to buy quality metal wall hangings and wooden wall decorations.